About this deal
Cut an 18” x 18” square out of your fleece fabric. Fold the edges over and hem them (about an inch). Then fold the hemmed edges in toward each other with the pretty side of the fabric on the inside. Then sew across the folded edge. Find the center of the circle and pin it so you don’t lose it. Then place your circular item over it, trace with a marker, and cut out your circle! Lay out your solid color ‘linen’ fabric (after ironing if necessary), and lay the fleece circle on top. Cut around the edges so you have two identical-sized circles. For the tie in the side poncho I put three strands together again, and chained 90 stitches. This made my tie/drawstring for the hood measure about 44 inches long with plenty of stretch. For putting the tie in around the hood,make sure you thread it through before putting the pom-poms on the ends.
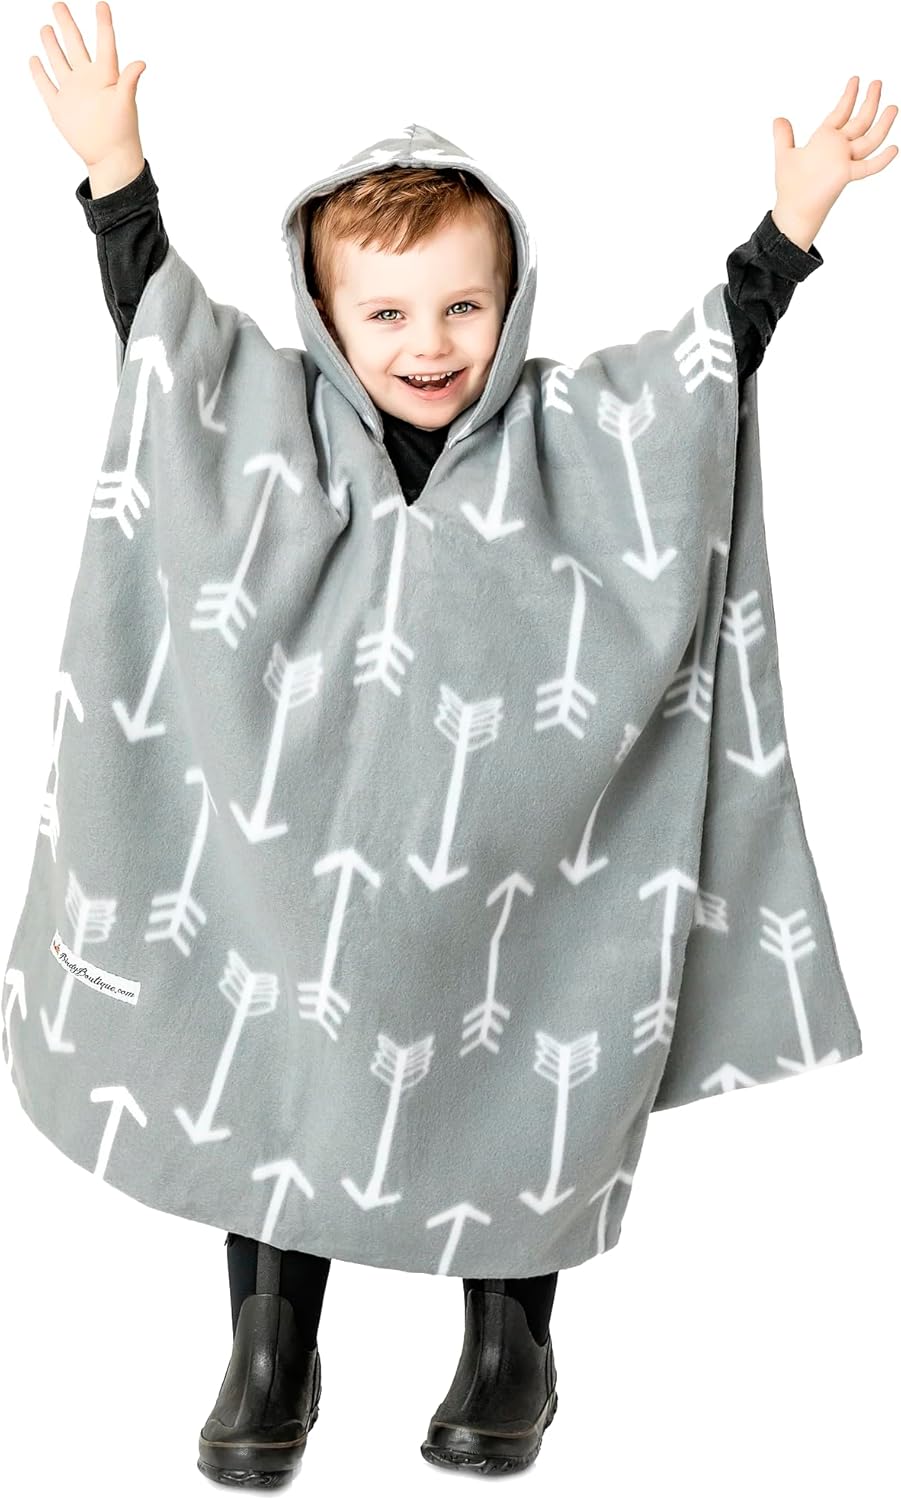
Thankfully the best search engine to ever be created (at least for visual people) was publicly open by now and I stumbled upon this tutorial for a fleece car seat poncho. I made one for each big boy and once Mercedes got big enough I made one for her. I also made one for our niece and will probably make one for our other nephews as well at some point soon. They make life so much easier! There is no fabric between the child and the straps so safety isn’t affected and because it is worn over the head it also isn’t going to fall off like a blanket could. I have a feeling a LOT of you are going to be making one of these car seat ponchos for toddlers for your little one, so be sure to send me pics or tag me on social media! (@RealityDaydream) …I can’t wait to see how yours turns out! Hem around the circle for the head hole too. Then lay it over the fleece circle and try to get it as centered as possible. This is a good time to think about whether there’s an ‘up or down’ to the print. Pin it down along the seem every 4-5 inches, then sew the two layers together right over the existing seam. I used a zigzag stitch so it would be a little forgiving, just in case I didn’t follow the line perfectly. Note: MAKE SURE THAT THE RIGHT SIDES ARE TOGETHER AND IF YOU HAVE DIRECTIONAL PATTERNS MAKE SURE THEY ARE FACING THE RIGHT WAY UP WHEN YOU CUT. IF YOU DON’T DO THIS YOUR HOOD WILL NOT GO TOGETHER CORRECTLY.Disclaimer: Fabric was provided to me free of charge by Shannon Fabrics to write about. I will be honest that youworkingwith cuddle fabric can be difficult if you are abeginner. I recommend getting a few other projects under your belt before working with cuddle fabric. Car Seat Poncho Pattern Tutorial Step 1a – Assemble the pattern and cut out pieces – body Lay your pinned body pieces on a flat surface. Grab a measuring tape or ruler and something to mark with. The goal is to make a slit, the long way down the poncho, for the hood. See my picture. If you are using a directional patterned fleece, make sure it is oriented the right way up! Measure the midpoint of poncho from left to right; if you used my measurements this should be around 14 inches. Shift your measuring tape up or down until it is 7-8 inches from the top. Sew slowly about 1/8 inch from the edge, or whatever makes you comfortable, and use your finger to guide the fabric. I usually have to pinch the edge and guide it in to make sure that the seam is out as much as possible. See step 5 photo. You can pin the opening and slow down when you get to it as it may take extra finagling to line up the edges; or you can just eye it and go for it. Step 6. Sew Around Hood Opening Winter parkas should NOT be used in car seats. In an accident, they can compress and the child can be ejected from the car seat. They are not safe. Here’s some great information from Safe Ride 4 Kids about the safety issues with winter coats.
And while we are on the topic of pom-poms, please know that you can make them any way you want. Although there are special pom-pom makers, I still prefer to use a simple homemade pom maker like the one in this tutorial. The pom poms I made for this crochet poncho were all made on a 1½ inch form, but for the pom-pom that was going on the hood I wrapped the yarn several more times so that it would be a bit bigger. FinishingThe benefit to fleece is that it won’t fray when washed… and you may not need to wash this a lot regardless. As a result, you can leave raw edges unlike if you were working with flannel or cotton fabric. This super hero cape goes around the arms and can be reversed to be a car seat blanket for baby! Get the tutorial here. The solution to this problem is to use a car seat coat. It keeps kids warm while running errands. Your child can be strapped into their car seat underneath the poncho… which means they can easily get it on and off if they get hot (assuming they’re old enough and agile enough to do so). How to Use a Car Seat Poncho Turn right side and sew gap shut. Optional – top stitch all the way around the cape using a .25 inch (.5 cm) seam allowance. Step 9 – add button and button hole. STEP 9. Sew hood halves, flip, and top stitch. Sew hood halves together leaving a 2-3 inch opening along the bottom (base) of the hood. Flip the hood halves out and pull the edges and corners out with your fingers and/or pins. Top stitch the hood halves just like you did the body of the poncho. Slow down when you get to the opening and use your fingers to match up the edges. Do this for the other half as well. Step 10. Sew Hood Pieces Together
It also means nothing is interfering with the function/strength of the car seat straps. Sizes Car Seat Ponchos for Babies Lay out the fleece on a large surface, smooth it out, and measure (twice!). Mark the cut points with a removable ink pen or chalk and cut 2 rectangles, 38 in x 28 in each. The great thing about this poncho tutorial is that the pieces don’t have to be perfect, they don’t have to perfectly align and you won’t even see a difference. Step 3. Pin Body Pieces I’ve taken the tutorial from PatternShmattern and modified it slightly based on what I’ve done. The first one I made I followed her steps exactly but I didn’t like how awkward it was for me to get the hood attached. I came up with a slightly different method for achieving the same result so hopefully it works for you! Now it’s time to take the 2nd square and place the Poncho front V Negative on the top corner and cut it out (seepicture). Then with the frontpiecewe’re going to take one more additional step of taking out ruler and rotary blade cut the square in halfusingthe bottom of the V and bottom corner to line up your ruler, making two triangles. Howdy friends! I originally posted this Car Seat Poncho tutorial several years ago. But it’s been such a popular post, and SO MANY of you have made these for your littles over the years… I thought it would be worth re-posting!! PLUS, my girl Cypress was sooooo itty-bitty and not-yet-sassy!That said, you could make one every year or two that is the perfect length for your child. You just cut the circle to the length you want the poncho to fall to (ie. measure to knee and use that number- if it’s 15″ then you cut to 15″ instead of 23″). Note: Measurement I used for the length of my poncho was 23″… my video has instructions on how to adjust if needed, but this measurement has worked well for my kids. Most parents of young kids know bulky winter coats are not safe to use with car seats. So how do you keep your kids warm without needing to remove those heavy winter coats? With a car seat poncho. First, you’ll want to go to stitchuponatime.com and grab the free Riding Hood car seat poncho pattern.
 Great Deal